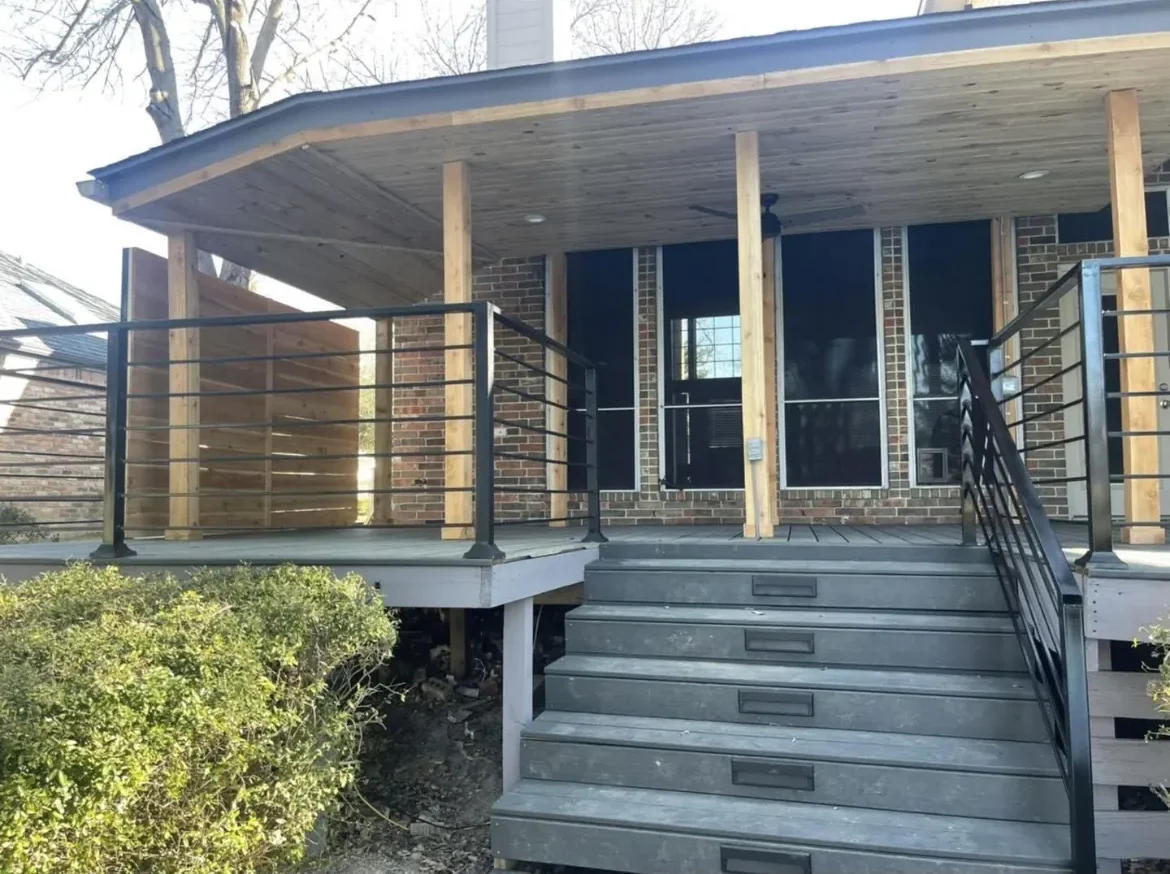
This is the whole build in order, with what happens at each step, the code numbers that matter, what you can check yourself, and a link to the guide that goes deeper. Most code numbers come from the American Wood Council's DCA 6 deck guide, based on the 2015 International Residential Code (IRC). It is the industry reference, not Dallas law: where it differs from the IRC, the IRC governs, and your local building official approves the work.
The deck building process at a glance (step by step)
Most permitted decks follow the same order: plan and permit first, then layout and footings, then framing, boards, stairs and railings, with inspections in between. The table shows each stage and what gets checked. It has no time estimates on purpose; for those, see how long it takes to build a deck.
| Step | What gets inspected or checked |
|---|---|
| 1. Site visit and 811 call | Paint or flags on the ground before any powered digging |
| 2. Design and drawings | The plan shows joists, beams, ledger, posts, footings and ledger fasteners |
| 3. Permit | Approved plans are kept on site for the inspector (Plano's rule) |
| 4. Layout | Equal diagonals; footing marks match the plan |
| 5. Footings | DCA 6: the building official verifies the holes before concrete |
| 6. Posts and beams | No beam bolted to the side of an un-notched post |
| 7. Ledger and lateral ties | Siding off, flashing in, hold-downs near both ends |
| 8. Joists, hangers, blocking | Hangers seated and fastened; framing inspection where your permit's list includes one |
| 9. Decking boards | Even gaps; each board over at least 3 joists |
| 10. Stairs and guards | Solid guard posts; stringers on a footing, not a shallow slab |
| 11. Final inspection | DCA 6: no use until final approval |
Which inspections your deck gets, and in what order, comes from your city. Plano, for example, issues the list of required inspections in order with the permit.
Step 1: Site visit and the Texas 811 call
Before anyone digs, buried utility lines get marked: Texas law requires notice to the 811 one-call center at least 48 hours before digging starts, not counting Saturdays, Sundays and legal holidays, and no earlier than 14 days ahead.
Texas's dig law covers powered digging 16 inches or deeper, which includes augering deck footing holes, and the duty sits with whoever digs.
How the 48-hour rule counts: because weekends and legal holidays don't count, 48 hours works out to two business days. Calling 811 on a Thursday morning means powered digging can start Monday morning at the earliest. The statute also has a Saturday rule: a notice given on a Saturday before 11:59 a.m. lets digging start the following Tuesday at 11:59 a.m. (Wednesday if Monday is a holiday). Two 2025 bills (SB 2042 and HB 3791) that would have rewritten the deadline as the second business day died in committee, so the statute's 48-hour wording is still the text in force.
DCA 6 also says not to build footings over septic systems or leach fields, utility lines or enclosed meters, and to call 811 before digging.
What to check: see the paint marks or flags in your yard before the first hole is dug, and tell whoever is digging where your septic system, meters and any lines you know about run.
Step 2: Design and drawings
The design sets the deck's size, height, attachment, materials and stair location, and it becomes the framing plan the city reviews. DCA 6 says a framing plan shows the deck's width and length, the joist and beam layout, the ledger, posts and footings, and the type, size and spacing of the ledger fasteners.
Attached or freestanding
This is the biggest structural decision at the design stage. Under DCA 6, a ledger must be at least a 2x8. If the house band joist can't be verified as able to carry the deck, the deck must be self-supporting (a non-ledger deck) or go through a full plan submission. Ledgers on brick, stone or masonry veneer, hollow masonry, cantilevered floor overhangs or bay windows are prohibited.
Designs that need their own engineering
DCA 6 covers single-level decks attached to the house to resist sideways load, no longer than they are wide. Large concentrated loads such as hot tubs are beyond its scope, so multi-level decks, hot-tub decks and other non-standard designs need their own design.
What a full drawing set looks like
Frisco's Form 4038 (February 2026) has no deck section, but its list for arbors, patio covers and similar structures shows a complete set:
- a plot plan with distances to all property lines;
- framing drawings with dimensions, elevations, a material list and post and beam sizes;
- for attached structures, the brackets, bolt size and length, and what it attaches to;
- a footer detail sheet showing how posts are anchored.
What to check: before you sign, the drawing should show joist size and spacing, beam and post sizes, footing locations, how the deck attaches (or that it stands alone) and where the stairs land, and the written price should describe the same deck.
Step 3: The permit and plan review
In Plano, any deck attached to a house needs a permit, as does any deck over 200 square feet, more than 30 inches above grade at any point, or serving the required exit door. Dallas applies its own test, explained in our Dallas deck and patio cover permit guide.
Three Plano rules show what the permit stage involves:
- Who pulls it. Applicants must be registered contractors, but homeowners may get permits for work at their own home. A contractor's registration can be suspended for failing to finalize permits with the required inspections.
- Engineered footings. Plano's amended code says every foundation or footing regulated by the code must be designed and sealed by a Texas-registered engineer. Ask the city or your builder whether your deck's footings need an engineer's seal.
- Plans on site. After review, one set of approved construction documents goes back to the applicant and must be kept at the job site, open to the inspector.
Fees, portals and drawings for each suburb are in deck permits in Plano, Frisco and McKinney.
What to check: the permit is issued and posted before work starts, you know whose name it is in (yours or the builder's), and the approved plans are on site.
Step 4: Layout with batter boards and string lines
The deck's exact footprint is marked with batter boards and string, squared with a 3-4-5 triangle, and checked by making sure both diagonals measure the same. This is a common layout method, not a code rule.
The usual sequence, from This Old House and Decks.com:
- On an attached deck, drop the ledger's two ends to the ground.
- Set batter boards about 2 feet beyond each outside corner and run taut, level mason's line (which "is stronger and doesn't sag," says Decks.com).
- Square the corners with 3-4-5, or larger multiples such as 6-8-10 or 9-12-15 for accuracy, until both diagonals are equal.
- Mark the beam centerline, drop each footing center with a plumb bob, and mark it with paint or lime.
- Take the strings down to dig, then retie them to check the holes.
Decks.com adds that stairs need footings at their bottom corners, and heavy loads like hot tubs may need more or bigger footings. This Old House sets the frame to drop about 1/16 inch per foot away from the house so water drains off.
What to check: walk the strings before digging. Confirm the deck sits where you expect next to doors, windows and property lines, and that the footing marks match the plan. A string is easy to move; a footing is not.
Step 5: Footing holes and the footing inspection
Under DCA 6, footings bear on undisturbed soil at least 12 inches below the undisturbed ground surface or below the frost line, whichever is deeper, and the building official verifies the bearing conditions in the field before concrete is placed.
DCA 6 adds one rule that matters next to the house: deck footings closer than 5 feet to the house foundation must bear at the same elevation as the house footing.
Footing size comes from a table. DCA 6 Table 4 assumes 1,500 psf soil and 2,500 psi concrete. One example: a beam spanning 8 feet that carries joists up to 14 feet long takes a 24-inch round or 21x21-inch square footing, 10 inches thick. Depth in Dallas clay, pier types and the full size table are covered in deck footings in Dallas clay soil.
Quikrete says to dig about 6 inches deeper than required for 6 inches of compacted gravel, set hardware into the fresh concrete, and let it cure one day before building on it (about 3 days with standard mix).
What to check: the number and location of holes match the plan, and the footing inspection is passed before the concrete goes in. Ask to see the result; once concrete is in, nobody can see the hole again.
Step 6: Posts, beams and bracing
Posts sit centered on the footings, beams sit on the posts in a notch or a post cap, and tall corner posts get diagonal braces. DCA 6 sets these rules:
- posts are 6x6 minimum, centered on the footings;
- the beam attaches by notching the post or with an approved post cap, and all 3-ply beams need a post cap;
- through-bolts need washers under both the head and the nut;
- hanging a beam on the side of a post without notching is prohibited;
- each corner post over 2 feet tall gets diagonal bracing, fastened with 1/2-inch lag screws (center posts don't need it).
Codes differ on post size. JLC reports the 2021 IRC sizes posts by species and load area, lets a 4x4 post reach 14 feet in some cases (previously 8 feet), and allows footings as small as 8 inches across. DCA 6 (2015 IRC basis) still says 6x6. Your city's adopted code decides.
Beam size sets the post spacing
Reading DCA 6 Table 3A (2015 IRC basis; Southern Pine No. 2, 40 psf live load plus 10 psf dead load): a beam of two 2x10s carrying joists up to 12 feet spans 7 feet 1 inch, while a beam of three 2x12s carrying the same joists spans 10 feet 6 inches. Beams can extend past the post by up to one quarter of the beam span.
A Simpson Strong-Tie engineer says a beam needs at least 1.5 inches of bearing on a wood post and at least 3 inches on concrete or masonry, across the full beam width, and on multi-span beams each ply must fully bear on the post.
DCA 6 also requires a grade mark on all lumber, a ground-contact rating (UC4A, against UC3B above ground) on anything touching soil, and field treatment of every cut with a preservative such as copper naphthenate.
What to check: no beam bolted to the side of an un-notched post; post caps on 3-ply beams; washers on every bolt; braces on corner posts over 2 feet; grade stamps and treatment tags on the lumber, with a ground-contact rating on anything touching soil.
Step 7: Ledger and lateral connection (attached decks)
On an attached deck, the ledger goes on after the siding comes off and flashing is in place, fastened to the house's band joist with 1/2-inch lag screws or bolts with washers, never lead anchors and never to brick veneer. DCA 6 requires corrosion-resistant flashing at a ledger on a wood-framed wall.
For sideways pull, DCA 6 calls for hold-down tension devices in at least two places within 2 feet of the deck's edges, each rated at least 1,500 pounds. Fastener spacing, edge distances and flashing details are in our guide to deck ledger board attachment.
What to check: siding off and flashing visible before the ledger goes up, washers on every lag or bolt, two hold-downs near the ends, nothing fastened to brick.
Step 8: Joists, hangers and blocking
Joists are sized from a span table, set crown up in one flat plane, hung in hangers at least 60% as deep as the ledger or beam (DCA 6), and blocked so they can't roll.
How far joists can span
| Joist size (Southern Pine No. 2) | Max span at 16 in on center | Max span at 12 in on center |
|---|---|---|
| 2x8 | 11 ft 10 in | 13 ft 1 in |
| 2x10 | 14 ft 0 in | 16 ft 2 in |
| 2x12 | 16 ft 6 in | 18 ft 0 in (DCA 6's 18-foot cap) |
Source: AWC DCA 6 Table 2 (2015 IRC basis), 40 psf live load plus 10 psf dead load, wet service. Overhang past the beam is limited to the table value or one quarter of the span, whichever is less, and joists and rim joists that carry guard posts must be at least 2x8. The 2021 IRC reorganized this table completely, replaced the one-quarter cantilever rule with a maximum cantilever listed for each span, and added 50, 60 and 70 psf snow loads, so your city's adopted code governs.
Reading AWC's DCA 6 span table (2015 IRC basis): a 12-foot joist span in Southern Pine at 16 inches on center is too long for a 2x8 (11 feet 10 inches maximum) but within a 2x10 (14 feet 0 inches). That is a table reading, not a design.
Composite boards change the spacing. Trex says joists for composite decking should generally be no more than 16 inches on center, 12 inches is required for diagonal decking, and stair stringers follow the tread maker's spec, usually 12 inches or less.
Straight, flat framing
Fine Homebuilding says to set joists crown up, save joists with crowns or twists over 3/8 inch for blocking, and keep joist tops in one plane by shimming rather than notching. Trex notes treated lumber "is usually sold wet" and keeps bending as it dries, and its 2026 guide warns that uneven areas in a sleeper substructure transfer to the boards.
Joist hangers
DCA 6 sets minimum hanger capacities of 400 pounds for a 2x6 joist, 500 for a 2x8, 600 for a 2x10 and 700 for a 2x12, picked from an approved maker's data for that joist size. Clip angles or brackets must not be used to support joists, and joists may not frame in from opposite sides of the same beam.
A Simpson Strong-Tie engineer adds:
- install hangers with code-listed structural screws, and where a hanger is fastened in double shear, use fasteners at least 2.5 inches long;
- the joist must sit tight in the hanger, with gaps under 1/8 inch;
- joists that bear on top of a beam need at least 1.5 inches of bearing and a tie against uplift (DCA 6 allows a hurricane clip).
Metals have to match. DCA 6 says fasteners and connectors must be the same corrosion-resistant material, with hangers galvanized (G-185 if galvanized before fabrication) or stainless. Simpson's engineer: galvanized hangers (ZMAX or hot-dip) with galvanized fasteners, stainless with stainless.
Blocking and rim joist
When joists bear on and overhang a beam, DCA 6 puts blocking between them at the beam and a continuous rim joist across their ends. Simpson's engineer advises that without blocking, joists shouldn't span more than 8 feet, and blocking should be as deep as the joists. Fine Homebuilding says to treat cuts and holes with a preservative such as 2% copper naphthenate.
Whether a framing inspection happens before boards go on depends on your city; your permit's inspection list says which. Plano inspects at your request as work progresses.
What to check before the boards cover it:
- every hanger fastened with the fasteners the hanger maker specifies;
- joists seated tight, with no clip angles holding joists;
- joist size and spacing match the drawing;
- blocking at the beam and a rim joist across the ends;
- matching metals, and joist tops in one flat line.
Should you use joist tape?
Joist tape is a self-adhering waterproof tape for the tops of joists and beams that helps keep water out of the wood and screw holes; it goes on before the boards and costs little, but none of the sources here say code requires it.
Decks.com, which Trex owns, recommends butyl over asphalt tape for joists, beams, rim joists, the ledger and stair stringers, and says tape for a deck usually costs "under $100" (national, materials only). Trex Protect carries a 25-year warranty from Trex. Fine Homebuilding also advises a membrane or caps on joist tops before decking.
What to check: if tape is in your quote, see it on the joists before the first board goes down.
Step 9: Decking boards
Boards go down across at least three joists each, fastened at every joist and gapped to the maker's spec so water drains and the boards can move. DCA 6's rules for wood decking:
- 2x lumber or span-rated decking, with two 8d threaded nails or two #8 screws at each joist;
- boards spaced about 1/8 inch apart, running anywhere from square to the joists to 45 degrees;
- each board segment bearing on at least 3 joists.
Composite gaps come from each maker. As one example, Trex's 2026 installation guide gaps boards 3/16 inch side to side at all temperatures, and end to end 1/8 inch above 40°F or 3/16 inch below 40°F. Diagonal boards need joists at 12 inches on center (Trex). Each brand's gaps and fastener systems differ; compare them in hidden fasteners vs face screws.
What to check: even gaps, straight lines, butt joints over solid framing, the board maker's fastener, and a flat surface.
Step 10: Stairs and railings (guards)
Any deck more than 30 inches above grade needs a guard, and DCA 6 stairs need 2x12 stringers, at least 36 inches of width and a solid footing at the bottom.
Guards
DCA 6 guard posts are at least 4x4, attached to 2x8 or larger joists or rim joists, with hold-downs rated at least 1,800 pounds for a 36-inch guard. JLC reports that the 2021 IRC prohibits notched 4x4 guard posts and requires guard connections to "extend back into the framing" so a guard can't pull off a rim joist or twist a side joist. Heights and baluster spacing are in our deck railing height code guide.
Stairs
DCA 6 stair rules:
- stringers at least 2x12, and stairs at least 36 inches wide;
- if only cut stringers are used, at least three; on stairs wider than 36 inches, stringers no more than 18 inches apart;
- landings at least 36 inches deep, plus an intermediate landing on stairs over 12 feet of total rise;
- a stringer support post sits on a footing 12 inches round or 10 inches square, 6 inches thick, and stringers must not bear on a concrete pad or patio that isn't founded at footing depth.
Riser, tread and handrail numbers are in the deck stair code for Texas guide.
What to check: push hard on each rail post and look for flex; no notched 4x4 guard posts; stair stringers sitting on a footing, not on a patio slab.
Step 11: Final inspection and handover
A permitted deck isn't ready to use until it passes final inspection: DCA 6 says decks shall not be used or occupied until final inspection and approval.
How it works in two suburbs:
- Plano: approvals from every department on the inspection list are needed before the final building inspection. A permit allows 180 days to begin work, and work must continue to keep it from expiring.
- Frisco (Form 4032, February 2026): field documents must be submitted before an inspection can be scheduled, online requests close at 7 a.m. on the day of the inspection, and a failed residential inspection carries a re-inspection fee. Frisco builds to the 2024 IRC with local amendments.
Plano's re-inspection triggers include work not ready, approved plans not on site, and work locked or unavailable, so have the plans out and the work reachable.
Final walk-through:
- confirm the permit is closed out with a passed final;
- walk every board and every step;
- shake each rail;
- look underneath if you can: hangers, hold-downs, post caps, bracing;
- keep the approved plans and any product warranty papers.
What to check at each stage (homeowner checklist)
You don't need to be a carpenter to catch most problems: at each stage, compare what you see with the approved drawing. Here is every check in one list.
| Stage | What to look for |
|---|---|
| Site visit and 811 | Paint or flags before digging; septic and meters pointed out |
| Design | Drawing shows joists, beams, posts, footings, attachment, stairs |
| Permit | Permit posted; approved plans on site |
| Layout | Strings match the drawing; diagonals equal |
| Footings | Holes match the plan; footing inspection passed before concrete |
| Posts and beams | Notches or post caps; washers; corner braces; lumber tags |
| Ledger | Siding off; flashing; two hold-downs; nothing on brick |
| Joists | Hangers seated and fully fastened; blocking; matching metals |
| Joist tape (if quoted) | On the joists before boards go down |
| Boards | Even gaps; joints over framing; flat surface |
| Stairs and guards | Rail posts don't flex; stringers on a footing |
| Final | Final passed; plans and warranties in hand |
If you'd like a builder to walk your yard and talk through these steps, Archetex Outdoor Design Co. designs and builds custom composite and wood decks across Dallas and nearby cities, and owner Matthew offers a free site visit and written price.